Close

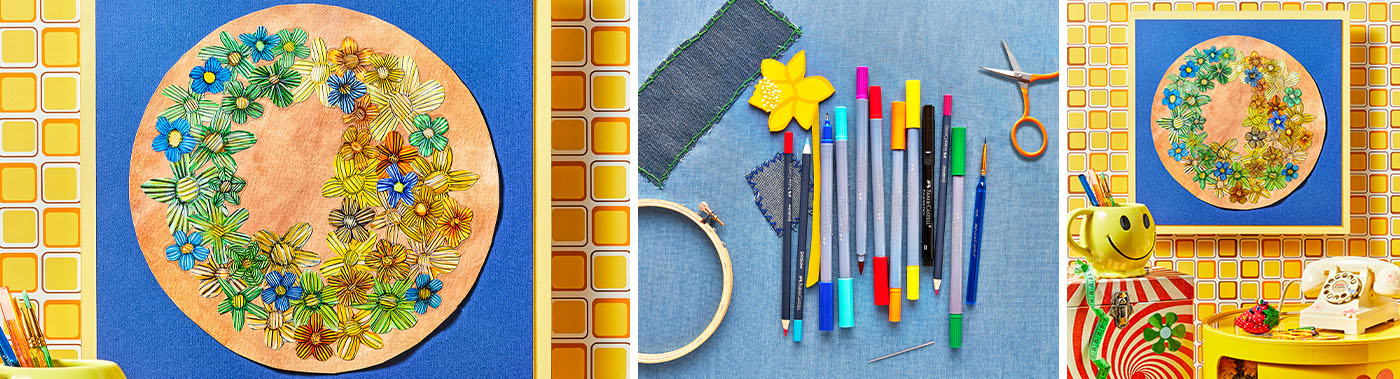
Vintage Faux Embroidery Sticker Collage
Lesson Plan, Grades K-12, Art History, History, Social Studies, Faber-Castell, Drawing, Mixed Media
Description
Lesson Plan and Artwork by Kathryn Cahill
Since the 1960s, young people in America have sewn embroidered patches onto their clothing to express their identities and personalities. Embroidered clothing has historically united groups of people using symbolism. Students will research the art history and meanings of embroidered fashion in the United States since 1960. Students will draw their designs onto sticker paper to create faux embroidered patches, then assemble the stickers onto a relevant background or surface.
Objectives
- Research the history of American embroidered patches and explain the symbolism of the images and words used during a time period.
- Draw several faux embroidered patches onto sticker paper using a variety of layered mixed-media drawing supplies.
- Paint or find an appropriate surface for arranging and collaging the faux embroidery stickers together to create a visual statement.
- Display, discuss and critique.
Supplies Needed
Faber-Castell® Goldfaber Aqua Markers, Dual Ended, Assorted Colors, Set of 24
Faber-Castell® Assorted Triangular Paint Brushes, Set of 6
Faber-Castell® Goldfaber Colored Pencils, Set of 12
Faber-Castell® PITT Artist Pens, Assorted Tip, Set of 4
Strathmore® 300 Series Watercolor Pad, 18 x 24 Inches, 140 lb, 12 Sheets
C-Line® Cleer Adheer® Heavyweight Laminating Sheet, 9 x 12 Inches, Pack of 50
Avery® TrueBlock® Full Sheet Label, 8½ x 11 Inches, White, Pack of 25
Fiskars® Pointed Tip Kids Scissors 5 Inches Assorted Colors, Pack of 12
Standards
Standard #8: Interpret intent and meaning in artistic work.
Standard #10: Synthesize and relate knowledge and personal experiences to make art.
Standard #11: Relate artistic ideas and works with societal, cultural and historical context to deepen understanding.
Instructions
1
Present photographic images to document the historical use of embroidered patches in American fashion since 1960. Explore the possible meaning of popular images like flowers, peace signs and smiley faces and popular fabrics including tie dye and denim. Students should choose some specific images that are personally and culturally significant to explore in this project.
2
Look very closely at the details of an embroidered patch and demonstrate how to build up mixed-media layers to create the overall look of embroidery.
3
Begin by loosely sketching out the image on the Shipping Label sticker paper by using the lightest colors of Faber-Castell Goldfaber Aqua Dual Markers. Color swatches labeled with color numbers on the appropriate sticker paper can be very helpful for choosing a coordinating color palette of markers.
4
Add brighter layers of hatched marker color on top of the light marker sketch. Pay close attention to the line direction of the drawing to create the look of individual threads. Use light grays and black Faber-Castell PITT Art pens to draw depth and shadow. Allow the marker to dry completely between layers. The label paper is backed in plastic which slows drying, and multiple wet layers and friction could cause the paper to pill or become damaged. Allow the markers to dry completely. Finish the look of highlighted glossy threads by layering on hatched rows or “stitches” with the opaque and light colors of Faber-Castell Goldfaber Colored Pencils.
5
Cut out the faux embroidered images using scissors. Cutting helps to clean up any uneven “stitches” on the edges of the shapes.
6
If the stickers need to be protected, or if a glossy surface is desired, use the C-Line Cleer Adheer One Sided Laminating Sheets. Peel the backing of the laminating sheet a little at a time and stick the embroidery designs face down onto the laminating sheet. Be sure to replace the backing of the laminating sheet over the entire surface after all the stickers have been added. This helps to stabilize the entire sheet for cutting and prevents the scissors from getting stuck to the film. When cutting out the stickers, the backing of the laminating sheet will drop off and can be thrown away. The backing of the original sticker will remain.
7
Set the stickers aside and begin creating or finding a meaningful background or surface to arrange and display the stickers. A meaningful background for the stickers could be painted or drawn onto sturdy watercolor paper. The stickers could also be added to a found object like a folder, a laptop, or a cabinet.
8
Try multiple layouts and arrangements of the stickers and their backgrounds. It may help to take photographs of the desired arrangements before permanently adhering the stickers to the background.
9
Finally, peel the backs off the stickers and adhere them to the desired background. Display, discuss, and critique the artworks as a group.